|
V1.1.9 VVDI2 Commander software is released,and Xhorse VVDI website includes several different VVDI2 commander:VVDI2 Basic,VVDI BMW+Basic,VVDI2 VW VAG,VVDI2 Full.If you only want to do BMW key programming,VVDI2 BMW will be your best choice.
1.VVDI2 BMW Authorization
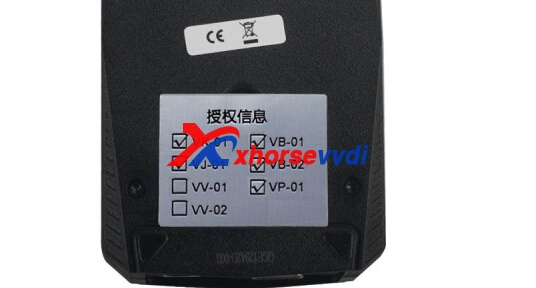
(VK-01) key programmer
(VJ-01) Passthru J2534
(VB-01) BMW OBD Function
If you want to do BMW CAS4+,suggest to buy BMW CAS4+ authorization.
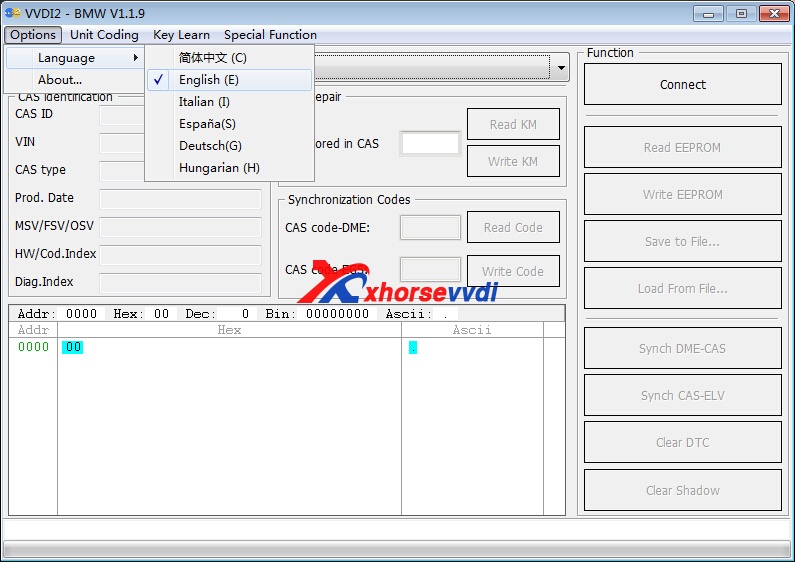
2.1.Language:
English,Spanish,Germany,Italian,Hungarian
2.2.VVDI2 Update 2016-09-06
Require firmware V2.1.9
BMW V1.1.9 1. Fix bug for select key position when make dealer key 2. Fix bug for software crash 3. BugfixTransponder Programmer V1.1.9 1. Immobilizer data tool: bugfix Rover Discovery 3
3.VVDI2 BMW Function
3.1.EEPROM/KM/Synchronization Codes (OBD)
3.2Key Learn
3.3File Make Key
3.4Unlock Key
3.5File Change KM
3.6CAS Repair
3.7CAS PLUG
www.xhorsevvdi.com all rights reserved, Original Article url:What do you know about VVDI2 BMW Key Programmer?
0 Comments
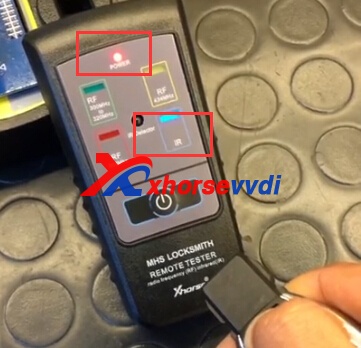
Xhorse Remote Tester Radio Frequency (FR) Infrared (IR) can detect frequency as well as infrared working or not ,and it is easy to use with.
1.How to use Xhorse Remote Tester for Radio Frequency?
1.1 Power On.It needs battery to work,package does not include battery,please prepare it by yourself.
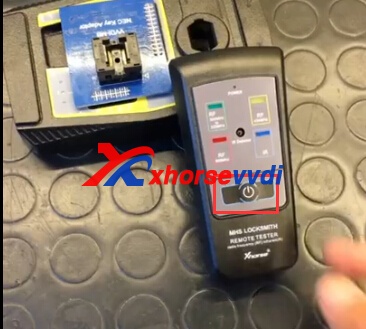
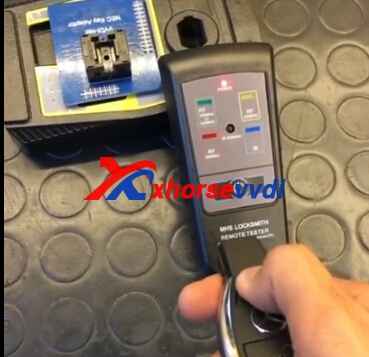
1.2.Press the key
IR blue led light and RF 434MHZ yellow light is flashing.
2.How to choose Xhorse Remote Tester?
2.1.We have two Xhorse Remote Tester,this SK199-B can not test frequency of 868MHZ,other are the same.If you need 868MHZ RF test,please check SK199.
2.2.Package does not include battery,please prepare it by yourself.
2.3.If mobile phone frequency is 868MHZ in your country,like US,please buy this Xhorse tester without 868MHZ.As the phone frequency will be recognised by tester,the tester 868MHZ light will be on,and beeping,never stop.
www.xhorsevvdi.com all rights reserved, Original Article url:How to use Xhorse Remote Tester for Radio Frequency?
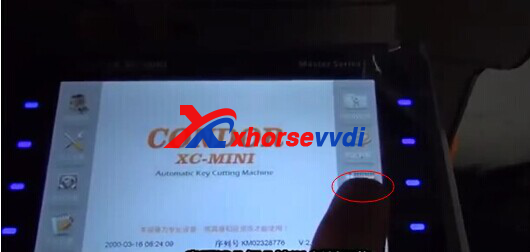
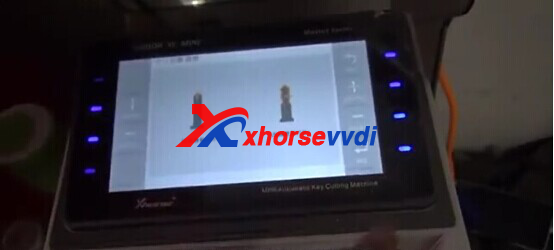
Condor Mini Key Machine Key Cutting Machine is on Promotion now,contact us online,you can get better price.XhorseVVDI.com shares the instruction how to cut Nissan NSN14 Key with condor xc mini Key cutting Tool.
1.Start your key cutting tool,and click cut by bitting.
2.Choose Blank key NSN14, and confirm.
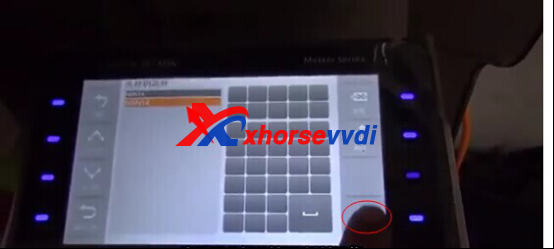
3.Select key type and confirm.
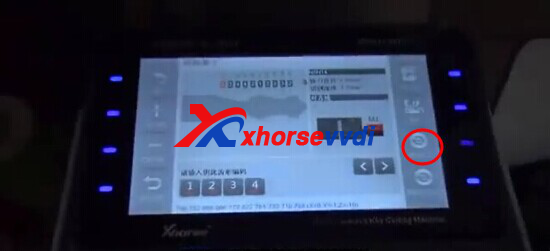
4.Click Key Decode button. Then it will show found bitting and Clamp M1 on the screen, click Confirm.
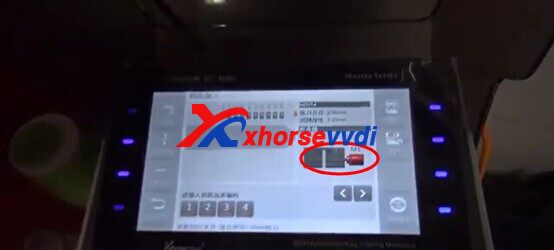
5.Verify bitting and modify bitting, click Cut

6.Put the new blank key.
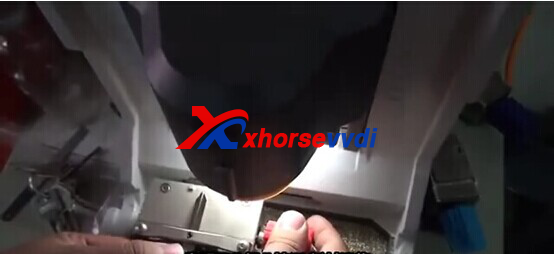
7.Click Direct processing
8.Cutting Key.Finish.
 
www.xhorsevvdi.com all rights reserved, Original Article url:How to cut Nissan NSN14 Key with Xhorse Condor XC-MINI?
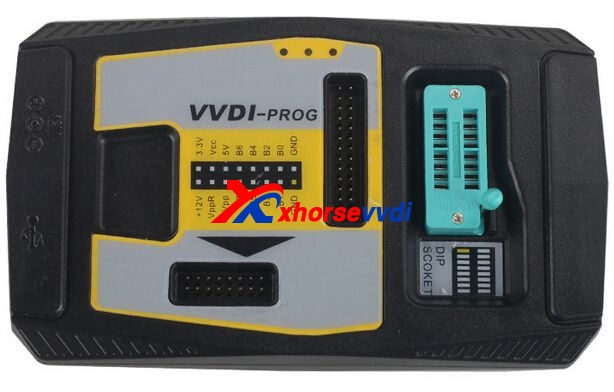
Note: Xhorse newly released a new VVDI PROG update on 04.21.2017! Below you can free download this latest VVDI PROG Programmer V4.5.7 software and see what’s new!
V4.5.7 VVDI PROG software download in mega:
Password: 123456
VVDI PROG V4.5.7 update info, what’s new?
This version DON't need update firmware
Fix some bugs
+ Add VVDI PROG USER MUNUAL 4.5.7 version in Doc folder
Fix some MC68HC (9)08 read error problem
Fix PIC12F (16F) diagram error problem
+ Add TC1762-CAN,
TC1766-CAN options in <2-MCU>-><INFINEON-TRICORE>
+ Add STM8AF5179,
STM8AF5268, STM8AF5269, STM8AF5286, STM8AF5288, STM8AF5289, STM8AF528A, STM8AF52A6, STM8AF52A8, STM8AF52A9, STM8AF52AA, STM8AF6168, STM8AF6213, STM8AF6223, STM8AF6223A, STM8AF6246, STM8AF6248, STM8AF6266, STM8AF6268, STM8AF6269, STM8AF6286, STM8AF6288, STM8AF6289, STM8AF628A, STM8AF62A6, STM8AF62A8, STM8AF62A9, STM8AF62AA, STM8AL3136, STM8AL3138, STM8AL3146, STM8AL3148, STM8AL3166, STM8AL3168, STM8AL3188, STM8AL3189, STM8AL318A, STM8AL31E88, STM8AL31E89, STM8AL31E8A, STM8AL3LE88, STM8AL3LE89, STM8AL3LE8A, STM8AL3L46, STM8AL3L48, STM8AL3L66, STM8AL3L68, STM8AL3L88, STM8AL3L89, STM8AL3L8A, STM8L051F3, STM8L052C6, STM8L052R8, STM8L101F1, STM8L101F2, STM8L101F3, STM8L101G2, STM8L101G3, STM8L101K3, STM8L151C2, STM8L151C3, STM8L151C4, STM8L151C6, STM8L151C8, STM8L151F2, STM8L151F3, STM8L151G2, STM8L151G3, STM8L151G4, STM8L151G6, STM8L151K2, STM8L151K3, STM8L151K4, STM8L151K6, STM8L151M8, STM8L151R6, STM8L151R8, STM8L152C4, STM8L152C6, STM8L152C8, STM8L152K4, STM8L152K6, STM8L152K8, STM8L152M8, STM8L152R6, STM8L152R8, STM8L162R8, STM8L162M8, STM8S003F3, STM8S003K3, STM8S003C6, STM8S003K6, STM8S007C8, STM8S103F2, STM8S103F3, STM8S103K3, STM8L105C4, STM8L105C6, STM8L105K4, STM8L105K6, STM8L105S4, STM8L105S6, STM8S207C6, STM8S207CB, STM8S207K6, STM8S207K8, STM8S207M8, STM8S207MB, STM8S207R6, STM8S207R8, STM8S207RB, STM8S207S6, STM8S207S8, STM8S208C6, STM8S208C8, STM8S208MB, STM8S208R8, STM8S208RB, STM8S903F, STM8S903K options in <2-MCU>-><ST-STM8>
+ Add ME17.9.11.1 (TC1762) option in <3-ECU>-><KIA>
+ Add MED17.1 (TC1766) option in <3-ECU>-><VOLKSWAGEN>
+ Add EIS-W639 (1J35D), EIS-W639 (3K85K), EIS-W639 (4J74Y) options in <4-IMMOBILIZER>-><BENZ>
+ Add JIEFANG-J6-HCS300 option in <4-IMMOBILIZER>-><FAW>
Change JIEFANG-J6-BCM option (Support up to 5 remotes)
+ Add SENOVA-D60 option in <5-DASHBORAD>-><BAICMOTOR>
+ Add EADO option in <5-DASHBORAD>-><CHANGAN>
+ Add TRUMPCHI-GS4 option in <5-DASHBORAD>-><GACMOTOR>
www.xhorsevvdi.com all rights reserved, Original Article url:VVDI PROG V4.5.7 Update + Software Download (04.21.2017)
VVDI Prog Programmer V4.5.2 try to read D70F3624,but get the error that "Try Frequency Failed Error" just like the picture shows:

Here is the probable solution:
I tried with and without external +12V supply.
Also tried manual frequency 8MHz and 4MHz. (I saw it was tested automatically but tried anyway.) Tried with and without FLMD1 connected. (Not used by other programmers) Also lifted 2 pins that you can see on pictures that were connected to RXD and TXD lines. Using MCU Reflash Cable V2 (verified connections inside, yellow wire on correct location, also did continuity test on the other wires) I tested myself the test points where I’m soldering against the MCU pins.   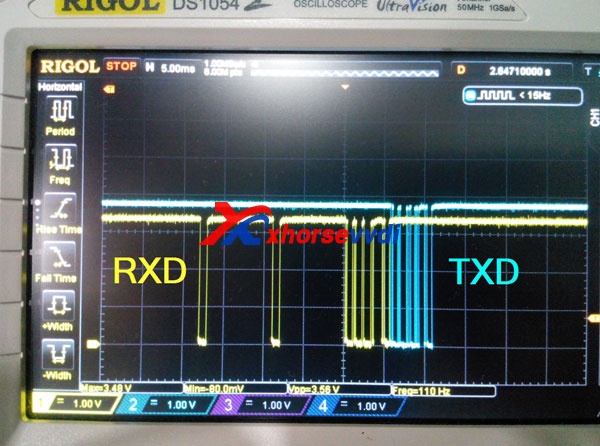
Some technical stuff:
VCC is set to 4.5V as default and measured 4.55V on pcb. FLMD1 always at 0V. FLMD0 pulled up to 3.5V. RESET when goes up reaches 4.5V. TXD when goes up reaches 3.9V, RXD 3.3V, bit timing of both RXD and TXD at any frequency set is always 104us (9600 baudrate). Oscillator on board is 8MHz. There are messages on both RXD and TXD. Having asked the experienced Samic, for help. They said the connection to chip is ok, should be software bug. And they thought currently the point is communication with chip. And i was advised to try to read the chip ID with other programmers
also require you to grab the signal of RXD and TXD line about 500ms.will find the caused reason and solve it.
So i used another programmer that reads it fine.
Device id:
10 7F 04 61 7F 7F 7F 8F 80 80 80 80 02 7F 7F 01 02 C4 37 B0 46 B3 B3 37 31 20 20 7F FF 00 00 00
VVDI-Prog doesn’t even reach that part, it stops after the first reply of the mcu.
I recorded my other programmer reading it with Saleae Logic (v1.25), attached session and dump.
f3624 read logged.rar (502.2 KB)
620595200_9805630180_upd70f3624_dflash_crash.rar (2.4 KB)
Samic helped to checked dump, saying this programmer use the default low baudrate 9600bps to read data.
VVDI PROG changed baudrate to 153600bps to decrease read time
baudrate change steps:
1.Use low baudrate 9600 wakeup the chip, if get the correct response,go to step2 2.Start change baudrate, due to the d70f3624 doesn’t know own osc frequency,programmer need send it the accurate value (VVDI-PROG put some common-used osc value,so you can see try frequency xxxxhz info) 3.Programmer send the new baudrate value to d70f3624, vvdi prog use 153600bps the d70f3624 can calculate the new baudrate with the osc value, but if the osc value is incorrect,you will get a wrong baudrate (eg: the actual osc is 4Mhz, if you set a 8Mhz osc value and change the baudrate to 153600bps the chip will set a 76800bps) 4.Use the new baudrate to communicate
Maybe the osc frequency is not in VVDI PROG osc value list
Please grab a new dump with vvdiprog,need to further analyze of the problem.
www.xhorsevvdi.com all rights reserved, Original Article url:How to Solve VVDI PROG Read D70F3624 Try Frequency Failed Error
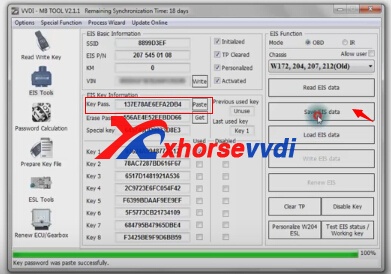
Most W204 W207 W212 ESL will damage with EIS,then you need to confirm ESL is working or not,if not working,need to replace new ESL.Here XhorseVVDI.com will share how to install ELV Emulator by VVDI MB Tool.
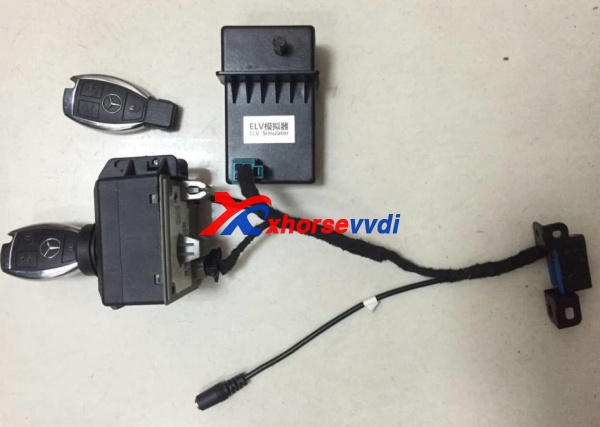
1.Connect EIS,Xhorse ELV Emulator.
2.Start VVDI MB Tool Software.
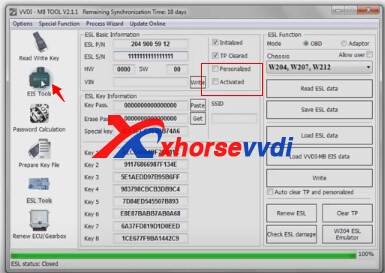
3.Clikc “ESL Tool”,choose chasis,and OBD way,then press “Read ESL Data”.

4.After read esl data,tick off Personalized and Activated option.
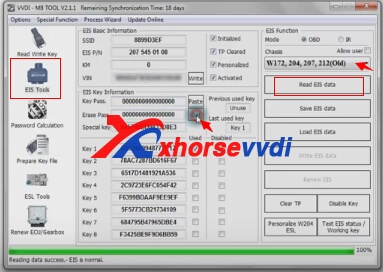
5.Click “EIS Tools” on the left,choose OBD way,and Chasis type to read EIS Data.
6.Click Get to erase EIS key password
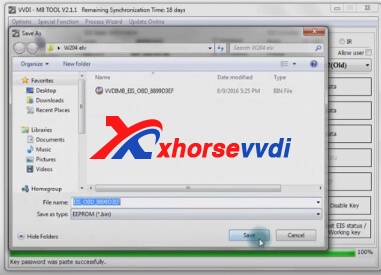
7.Paste key password,then save EIS data.
8.Press OK to save HC05 format file
9.”EIS Tools” page,choose IR mode,and click “Renew EIS”,then insert IR key to EIS.
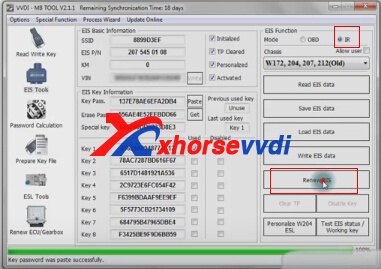
10.Insert IR adapter to car. Take out and insert again if it is already inserted. Wait about 28 seconds until erasing EIS success
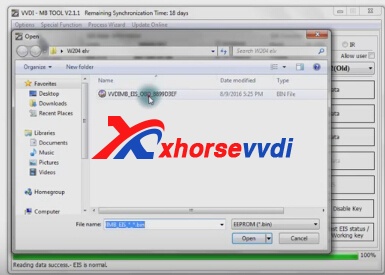
11.Select OBD mode,click “Read EIS data”.Reading data success, EIS is normal.
12.Click Load EIS data,and please open EIS data saved previously.
13.Click Write VIN.Please confirm VIN and click Yes to continue.
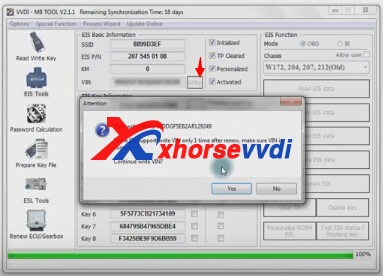
14.After write VIN success.Choose IR model,select Write EIS data,then click YES.
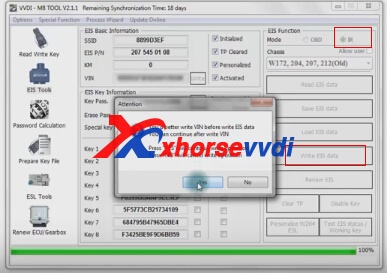
15.Please wait until Writing data success.Select OBD mode,and click Personalize W204 ESL.
16.ELV is personalized.
www.xhorsevvdi.com all rights reserved, Original Article url:How to install ELV Emulator by VVDI MB Tool
Here is step-by-step procedure on how to program CHIP 6E Ford RANGER 2013 by OBDSTAR F100 Ford Mazda programmer Purpose: PROGRAM CHIP 6E FORD RANGER 2013 Tool s to prepare: Chip TP33 (6E) OBDSTAR F100 Ford Mazda programmer Main procedure (Program success less than 3 minutes): Insert chip in new remote
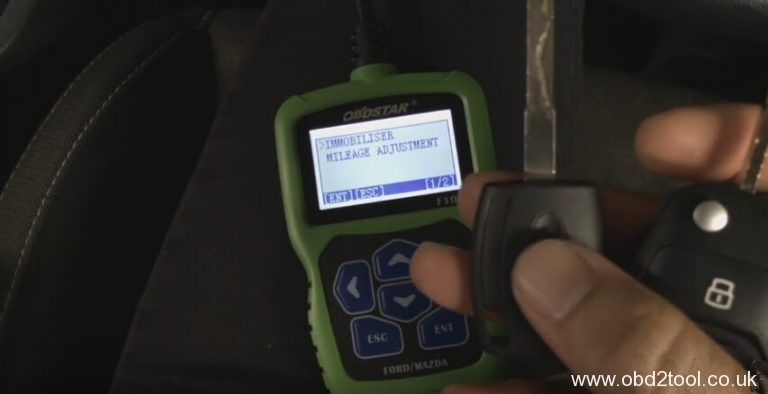 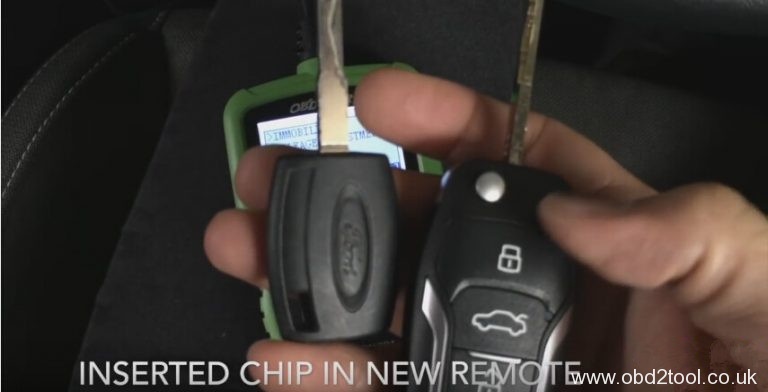 Open OBDSTAR F100 and choose the option “Immobilizer” Open OBDSTAR F100 and choose the option “Immobilizer” 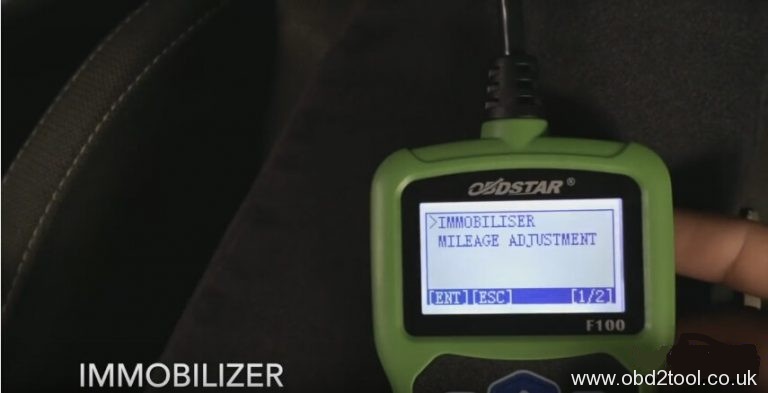 Choose “Ford/Lincoln”, loading… initializing…Authorizing… Choose “Ford/Lincoln”, loading… initializing…Authorizing… 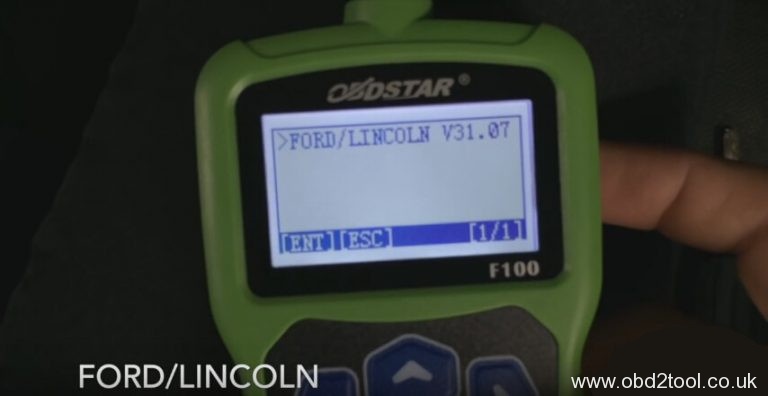 Choose Ford ->USA Ford->IMMOBILIZER->Ranger, communicating… Choose Ford ->USA Ford->IMMOBILIZER->Ranger, communicating…  Choose Program keys. Choose Program keys. 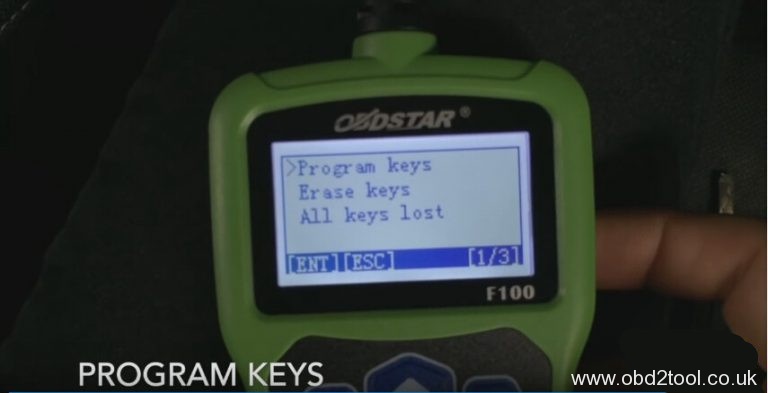 Get message “If all keys lost, need at least 2 keys to complete key programming.” Get message “If all keys lost, need at least 2 keys to complete key programming.” 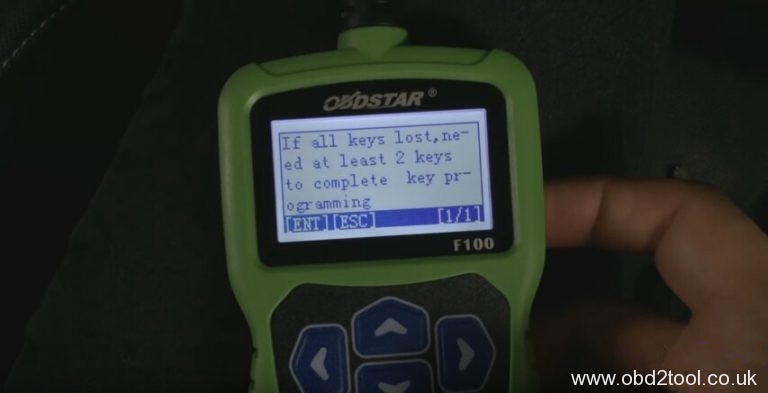 Insert adding key and turn on. Insert adding key and turn on. 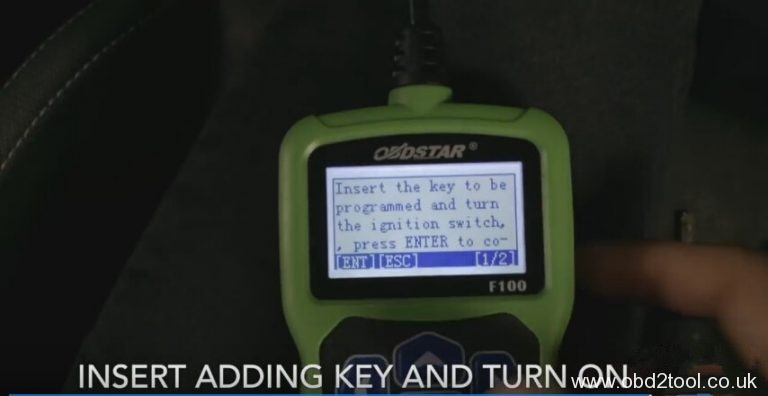 After turn on ignition, security light on the dashboard blinks because this key is not programmed. After turn on ignition, security light on the dashboard blinks because this key is not programmed.  Now have 3 keys in car. Now have 3 keys in car. 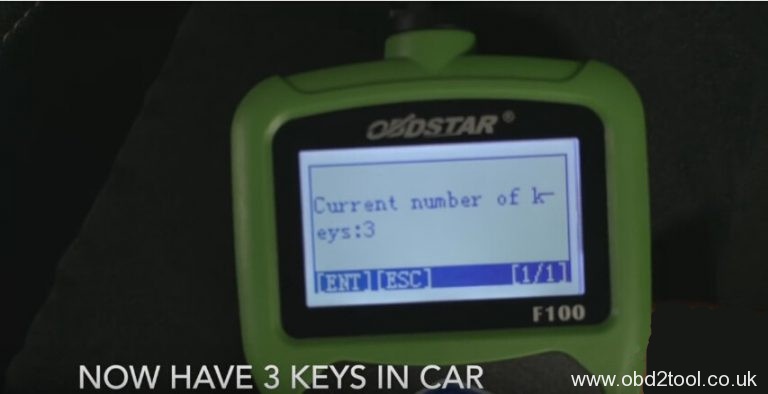 Security light goes off. Security light goes off. 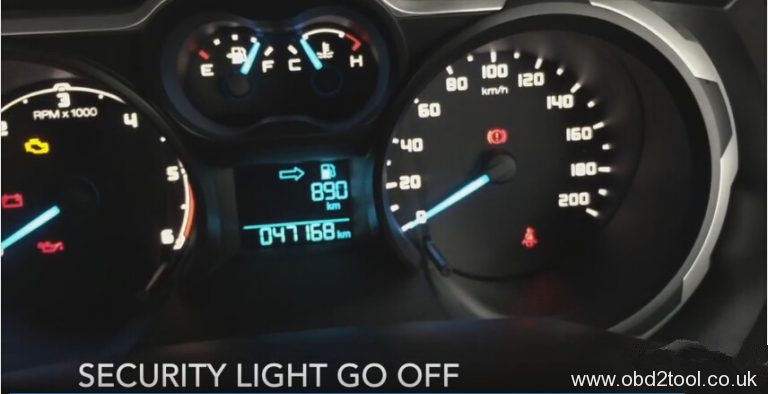 Now have 4 keys in car Now have 4 keys in car  Program success with obdstar F100 Program success with obdstar F100 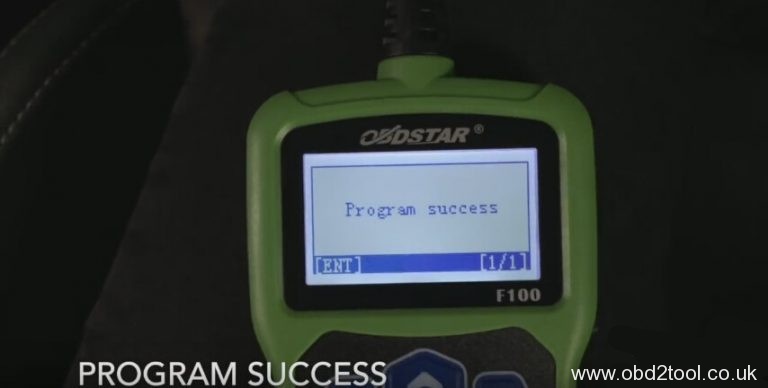
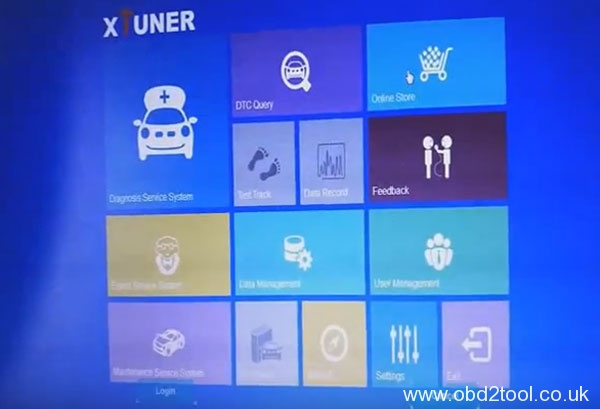
Here comes the first Hyundai ELANTRA on-board activate test of Xtuner E3 WiFi wireless OBD2 diagnostic scanner. Test Vehicle: Hyundai ELANTRA HDC 2012 Operating system: Lenovo Windows 7 64bit Detail Procedure: Pair with Xtuner E3 diagnostic interface via WIFI Run Xtuner E3 software (download the client from official website www.tdintel.com/) Click “Online Store” icon
 You need to input the S/N number and password to login You need to input the S/N number and password to login 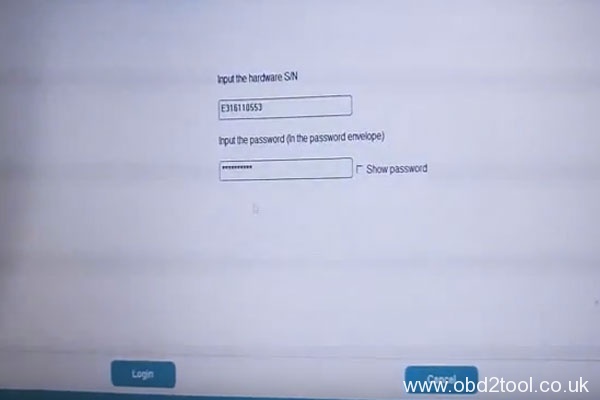 Then choose ESS -> Hyundai Pro -> Diagnose -> Vehicle Manual Select Then select ELANTRA(HDC)-> 2012->G1.6 DOHC, click Next to continue Then choose ESS -> Hyundai Pro -> Diagnose -> Vehicle Manual Select Then select ELANTRA(HDC)-> 2012->G1.6 DOHC, click Next to continue 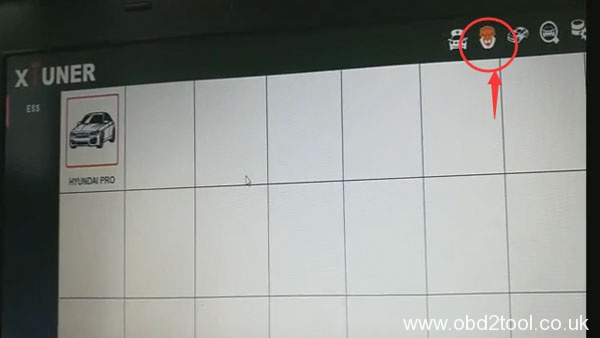 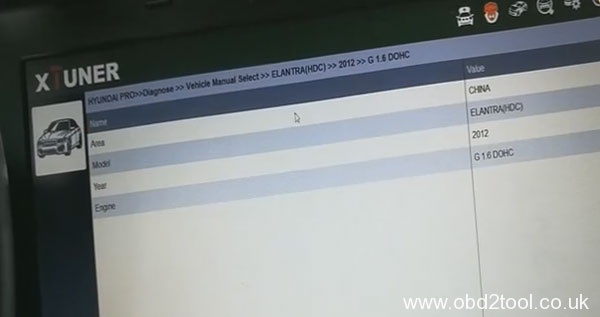 Then choose quick test Then choose quick test 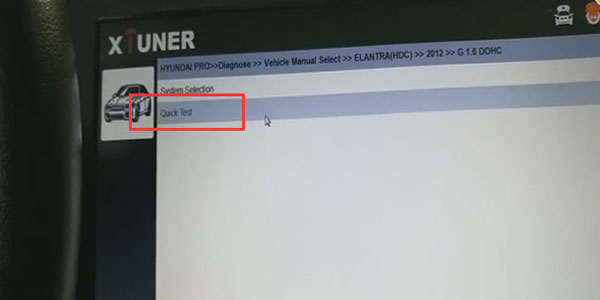 XTUNER E3 scanner will connect to ECUs XTUNER E3 scanner will connect to ECUs 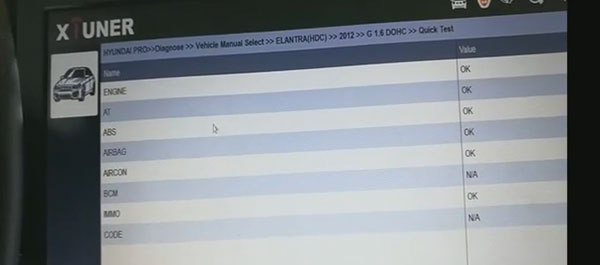 Click Exit to stop quick test Go back and choose System Selection -> ENGINE -> Data list Click Exit to stop quick test Go back and choose System Selection -> ENGINE -> Data list 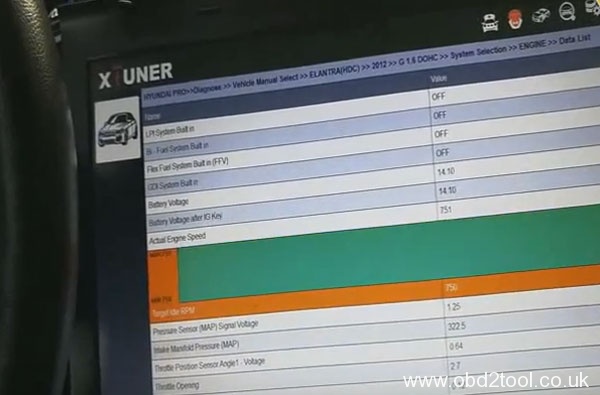 Go back and choose System Selection -> AIRCON-> Active Test Go back and choose System Selection -> AIRCON-> Active Test 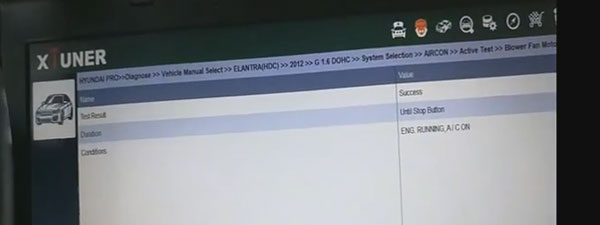 Go back and choose System Selection -> BCM -> Active Test -> Wiper Then you can notice that the wiper is working… Go back and choose System Selection -> BCM -> Active Test -> Wiper Then you can notice that the wiper is working…  Video Support: Xtuner E3 Wifi diagnose Hyundai ElantraHDC 2012 on PAD win10 https://www.youtube.com/embed/24WILHeVE2A Diagnose Hyundai ElantraHDC 2012 by Xtuner E3 Wifi on Win7 https://www.youtube.com/embed/_PBu4Q2E8fc Video Support: Xtuner E3 Wifi diagnose Hyundai ElantraHDC 2012 on PAD win10 https://www.youtube.com/embed/24WILHeVE2A Diagnose Hyundai ElantraHDC 2012 by Xtuner E3 Wifi on Win7 https://www.youtube.com/embed/_PBu4Q2E8fc
XTUNER E3 review here:
Car tested: Vauxhall Opel Corsa C 2006
Action: read ECU info, read clear DTC codes, program key, view data stream
Result: all functions tested OK.
Plug XTUNER E3 into Opel Corsa C OBD2 port and connect it with car via WIFI.

Open the XTUNER E3 software on WIN10 pad.

Go to “Europe” and choose “Opel”.

Europe Opel and Brazil Opel both are available.
In this case, choose “Brazil”.

Select car year and car model. This is a 2006 Corsa-C.
 
XTUNER E3 Opel function menu show as below: Engine, Transmission, Chassis and Body.

XTUNER E3 program key for Vauxhall Opel Corsa C:
Go to “Body” then “Immobilizer”.

Choose “Program Transponder Keys” function.

Turn on ignition and enter 4-digit pin code then follow the tips to complete key programming!
XTUNER E3 shows Corsa C ECU information as below:

Need to know more about new tool XTUNER E3?
 
www.diyobd2.fr all rights reserved, Original Article url:(Review) XTUNER E3 Test Report on 2006 Vauxhall Opel Corsa C
VVDI Prog programmer is mainly used to read eeprom,mcu data,it can also support calculate pin code/immo code for some car models, such as Ford, Mazda, Nissan, Saab .etc.Xhorse VVDI website will shares some steps about how to use VVDI Prog calculation function.
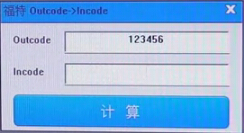
1.VVDI PROG Ford Outcode/Incode calculation
Start VVDI Prog software Click PIN Calculator button Select vehicle: Ford->> Outcode->Incode 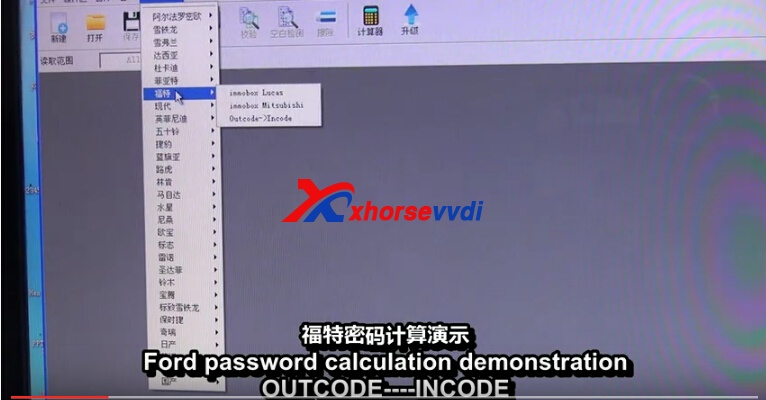
Then click calculate,it will shows the Ford Incode result.
2.Nissan 20-digit PIN code calculation by BCM code
Choose vehicle model: Nissan -> PIN 2013- 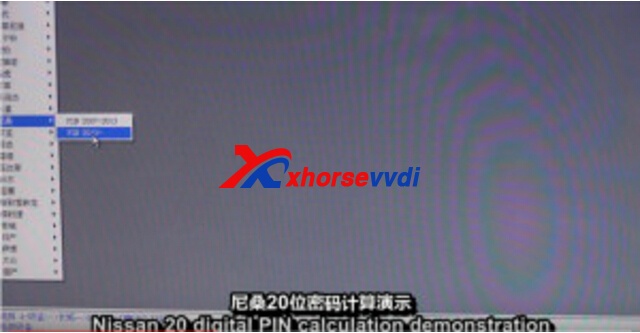
Input BCM code,click calculte to get the PIN.Meanwhile,the led light of VVDI Prog will flash.

3.Hyundai PIN Code calculation via VIN
Some vehicle models’ pin code can be obtained by simply enter the VIN (Vehicle Identification Number), like Hyundai pin code
You can choose Hyundaik,then copy or enter the VIN number, select Calculate 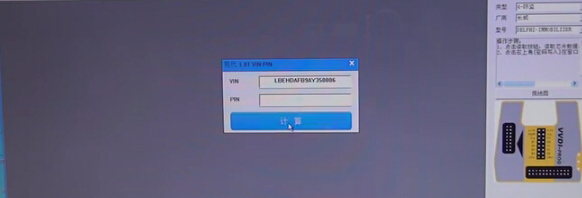
4. VW Magotan Pin code calculation via loading dump file
Some vehicle pin code can be obtained by load the dump bin file as well, for example VW Magotan,you need to load the dump file after choose the VW car model. 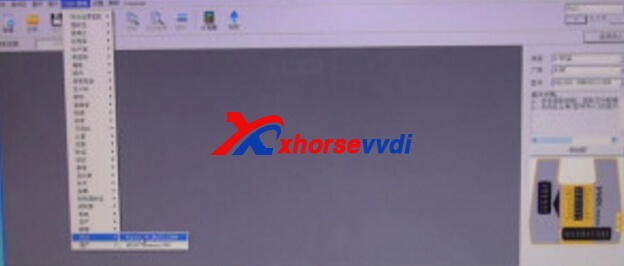 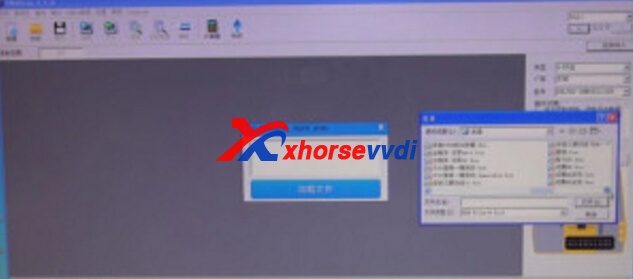
VVDI Prog also supports data comparison.
Load dump data file and then enlarge the file to make a comparison, it shows: 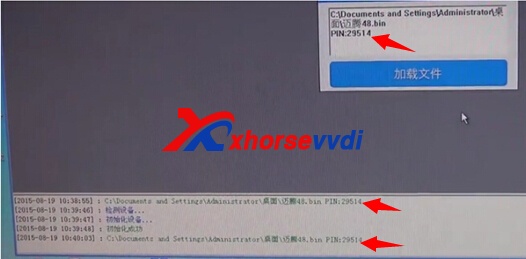
www.xhorsevvdi.com all rights reserved, Original Article url:VVDI Prog Pin Code Calculation Function Guide
|
obd2diy.fr:
obd2diy.fr s'applique spécialement à fournir d'appareil diagnostic auto - OBD2 Français Valise Diagnostique. Nous offrons des produits de haute qualité, le meilleur service et le prix le plus compétitif 存档
October 2019
类别 |
 RSS Feed
