|
Here, obd2france.com released DAF VCI Lite (V1), the replacement of old DAF VCI560,is a cheap but excellent truck diagnostic tool working on all DAF trucks (old and the newest EU6) with all ECE-standard cables and connectors, not customized. Here is the comparison of DAF VCI Lite (V1) and DAF VCI-560 Kit, which answers why can VCI Lite replace VCI 560 kiy.

new DAF VCI lite (V1)for €730, original VCI 560 for €3,229
* connection
DAF VCI lite used via USB connection, VCI 560 used via WIFI & USB connection
* LED display
VCI lite without LED display, VCI-560 kit with LED indicators
* PCB (hardware)
VCI lite hardware lacks one part on PCB, compared to VCI-560
(that missed part is not needed for any diagnosis, reprogramming, configuration)
* via OBD
VCI litecannot see ignition via OBD, VCI-560 can do that via OBD
* function
VCI-560 supports SCR/AdBlue removal, power increase, language programming with DAVIE Configurator (DEVIK)
VCI-560 also supports special programming and Service Level see DAVIE Developer Tool (DEVIE DT)
However, functions above are not listed in the DAF VCI lite package; that is, you need to buy in the DAF company.
Part 2 - Similarities between DAF VCI Lite & DAF VCI-560
* the same software (different version)
DAF VCI Lite software available:
DAF Davie XDc II Runtime 5.6.1 (Windows 7 supported)
DAF Davie Application 80.01
DAF Davie Parts Rapido Subset 15.31.F0
DAF VCI 560 software available:
DAF Davie XDc II Runtime 5.6.1 (Windows 7 supported)
DAF Davie Application 75.03DAF Davie Parts Rapido Subset 15.12FO
* update:
Both can be updated by official updates
* same languages:
English, German, Dutch, Danish, Czech, French, Italian, Finnish, Hungarian, German, Spanish, Norwegian, Russian, Greek, Polish, Turkish.
(DEFAULT LANGUAGE PROVIDED FOR USER IS ENGLISH !!!!)
* same systems supported:
DAF VCI Lite and VCI 560 can diagnose, troubleshoot and program:
After treatment system
Auxialiary system
Break system
CAB climate system
Communication system
Door control system
Engine system
HDOBD
Instrumentation system
Power supply and ground
Retarder system
Safety system
Security system
Steering control system
Suspension system
Tachograph
Transmission system
Vehicle control system
* nearly same functions and modes
Direct Testing mode allows immediate selection of individual control units and direct test of their components and functions.
Guided Diagnosis. Using the combination of self-diagnosis symptoms (content of fault memory) and observed symptoms (complaints from customer), the system generates a test plan and guides the user along the shortest route to the suspect component.
HD-OBD mode allows immediate selection of DAF independent control units and direct testing of their components and functions.
EOL (End Of Line) mode used in stations of the production area and allows programming, calibration, health check and diagnosing of newly produced vehicles.
You can switch between HD-OBD mode and EOL mode.
* DAVIE display


0 Comments
Especially thanks Mr. Jeffery Hayes for his kindness, spent a lot time to take photos of what he did on his 2008 Volvo s80 with OBDSTAR X300M programmer:
Mr. Jeffery Hayes said: hi, thanks for your help and i have managed to change km on my car. Some operation photos for you. Wish this helps.
Below is how to change mileage for Volvo s80 with the help of photos taken by Mr. Jeffery Hayes.
Volvo s80 '2008

the current mileage on the dashboard: 70106

connect X300M programmer to the car
then mileage adjustment starts
setup in X300 m
-> step 1 - select the corresponding model
select VEHICLES for MILEAGE AJUSTMENT


the list available

here, select OTHER MODELS with software v30.51 (OTHER MODELS v30.51)


loading...
initializing...
other models list


...
select VOLVO S80 07- for Mileage ajustment


-> step 2 - change km
switch ignition on (X300m says)
switch ignition off
reading mileage...

input the name of the file to save: 12300000

then x300m will display the input value 12300000
confirm the current mileage (nearly the same as the devices read), here the mileage: 70104km

then input the mileage of adjustment: 93520

then x300m will display the input value 93520
adjusting mileage...
mileage correction operation complete

S80 dashboard displays the km

volvo s80 mileage correction SUCCESS
Scania VCI 2 VCI3 software has updated to Scania Diagnosis and Programmer 3 SDP3 v2.27. Here is the instruction on how to install / setup Scania VCI 2 VCI 3 SDP3 v2.27 on Windows 7 32bit operating system.
Diyobd2:
How to setup Scania SDP3 v2.27 on Win7 32bit for VCI 2 VCI 3
SCANIA SDP3 v2.27 software is verified to work well on Windows 7 32 bit system, the chief diyobd2 engineer said. Here is how to install SDP3 2.27 for Scania truck diagnosis with VCI 2 and VCI 3.

Step 1 – Read read me 2.27.txt to get the installation instruction

Step 2 – Install AdbeRdr920_en_US.exe

Step 3 – Install NDP46-KB3045557-x85-x640-allOS-ENU.exe

Step 4 – Install vcredist_x86.exe

Step 5 – Install scania Diagnosis & Programmer 3 2.27.exe


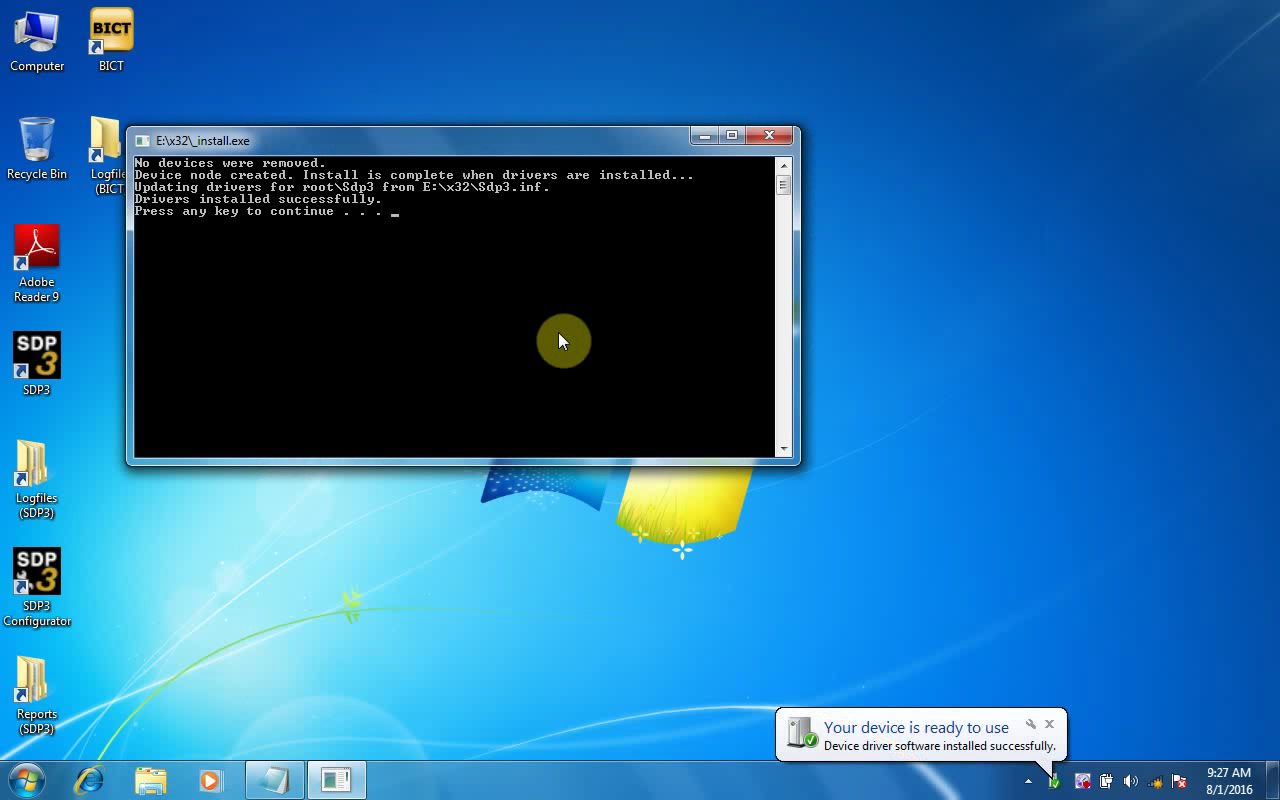
Step 6 – Once finished, run x32 folder the “install.exe”
Pass: 6426758

When required, allow install.exe to install driver


Step 8 – Run Scania SDP3 2.27 program
Run SDP3 configuration to setup language, authentication, interface and SDP3 update
Language available: English, German, Spanish, French, Japanese, Dutch, Polish, Portuguese, Swedish, Norwegian, Suomi, Turkish, Italian, Czech, Russian.


Run SDP3


Then you can use Scania SDP3 2.27 to
Stored fault codes, proposals for remedial action and delete option.
Control unit configuration and settings. Information about electrical components and their location. Input and output signals. Activation of components. Spare part programming. Circuit diagrams of the respective vehicle. Chassis data. User functions to meet service market requirements to work more effectively, e.g. cruise control.
Here are some user tips, which helps change km in dashboard 1999 Ford Focus, MCU HC11E9 (MaskSet: 4E28B) with clone Carprog v8.21.
Wiring diagram of Carprog clone A10 adapter:
- brown wire (GND) connect to pin 2,3 on MCU - blue wire (RESET) connect to pin 17 on MCU - green wire (comm to mpu RxD) connect to pin 20 on MCU - yellow wire (comm from mpu TxD) connect to pin 21 on MCU - 12v 

Hope that this will help to others.
Ceci est du support technique du site Web www.obd2france.com: Clone Carprog read MCU HC11E9 (wiring diagram)
Hunta says:
“opcom 1.39 has always worked for me reading security codes and for key programming”
x-paul-x06 says:
“opcom will read his security code but it should as i managed to down grade the firmware to 1.39”
Marks152 says:
“opcom v1.39 is the ONLY firmware you should be running when using 100219a. It is designed to run with this software and is the ONLY version that will allow FULL use of the interface. Any firmware higher will restrict access to the instruments.”
Ssmith73 says:
“1.39 firmware can get a spare key fob programmed”
....
So, only opcom firmware v1.39 can read pin and program keys together.
where can get working OPCOM for key programming?
Here, http://www.obd2france.com/ offers two options:
2009 OPCOM firmware v1.39:
Opcom v1.39 can read security codes and program keys in one device, as what users say above. But, unluckily, it stops production.
2012 OP-COM firmware v1.59:
2012 Opcom v1.59 can program keys also, but you need use Carprog v8.21 or CarProg 9.31 to read pin /security codes from engine ECU.
How to use opcom for key programming?
Opcom: Year -> vehicle -> body -> Cim -> Programming -> immo-programming -> security-code -> add new key
Immo


Security code
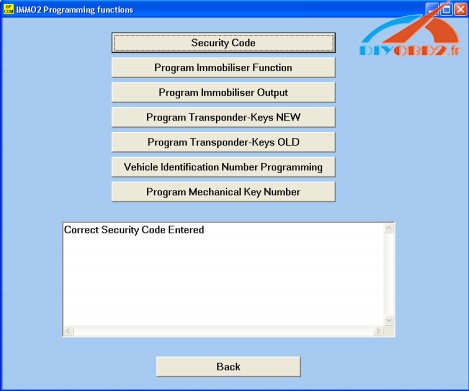


Program key


Ceci est du support technique du site Web op com en francais:Which OPCOM firmware can read security codes for key programming?
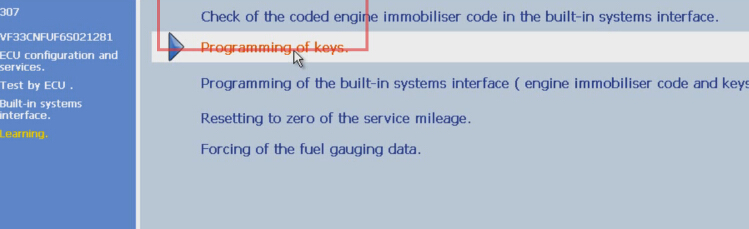
Last weekend, borrowed OBDSTAR F108 car key tool from my friend, and today used it to add new keys for my Peugeot 307 2001. But communication breakdown...


So this F108 failed to read security codes for 307 Peugeot 2001. It only support Peugeot after the 2008 year.
But maybe you can try program keys using Lexia 3 PP2000 (Notice obd2france.com lexia 3-pp2000 software don't support program keys)


note: sources above from a owner with Peugeot 307; PP2000 at obd2france.com never tested this function
2001 Peugeot is kind of of old. Maybe The Key Pro M8 can be tried. the model is listed

This is from OBD2 Francais website technical support:OBDSTAR F108 key programmer support 2001 Peugeot 307?
China Kess v2 also yes can be reworked like Ktag to work completely as the genuine. Here is the free solution of Kess V2 PCB rework.
TRY ON YOUR OWN RISK!
Kess v2 PCB:


Kess v2 rework:
Photo is of original board so check all others components to be as per this one.

If photo is not clear enough ...
Transistors to use : BCR112 MMUN2113 BC817
Murata filters:
NFE61PT472C1H9L (connect ground for all of them)
Capacitors:
1uF - 35V 220uF - 10V 10uF - 16V tantalum
Fill up all holes from side to side
Use photo as reference if others components are different
Then the clone KESS V2 will also work like a charm
The Key Pro M8 as a powerful locksmith diagnostic tool supports you to add & make new keys for full range of worldwide car models. Following guide is for Key Pro M8 make Hyundai Santa Fe Key. Hope it helps.
First, you need a Key Pro M8 auto key programmer. Key Pro M8 with newest software Standard version V11.13, Beta version V11.17 is available at
If you already owned this device, please go straight following steps:
Step1. Start Key Pro M8, click “Standard Software†then input password to unlock it. There is coming a warning message and next a tip for remaining tokens, all press “Enter†button.

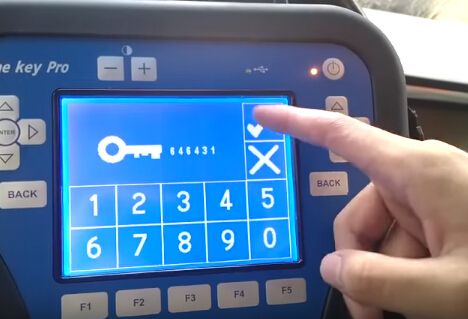
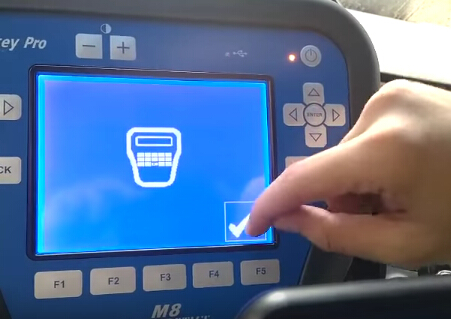
Step2. Vehicle Selection Menu: Choose “Hyundaiâ€â†’“Euro†→ “Proximity†→ “Vehicleâ€â†’ “Santa Feâ€. After that screen will show an image of the security calculator, click “√†at right bottom corner.

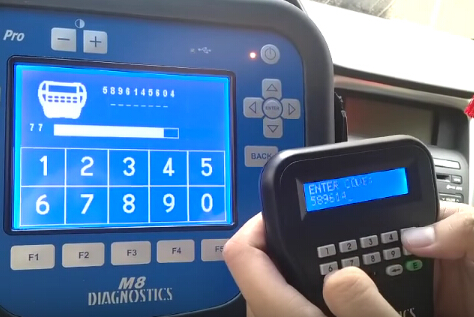
Step3. Key Pro M8 will show you code, input it into calculator, and you will get result, input the result code into Key Pro M8, then click“√â€.

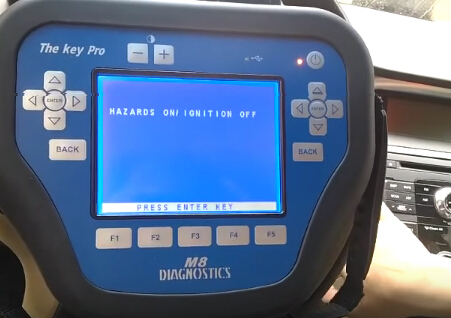
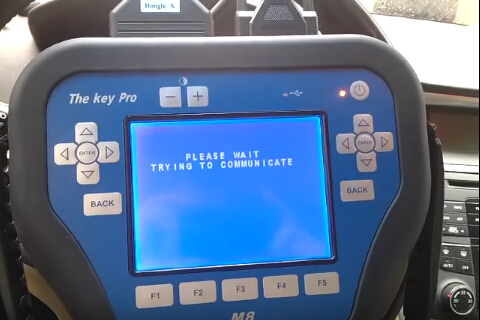
Step4. The screen will show “Hazards on/ ignition offâ€, follow this tip to turn off ignition. Now just wait a minute Key Pro M8 is trying to communicate.
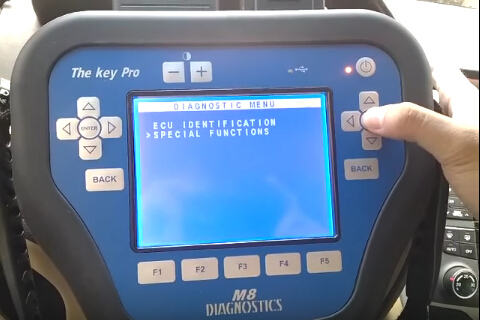
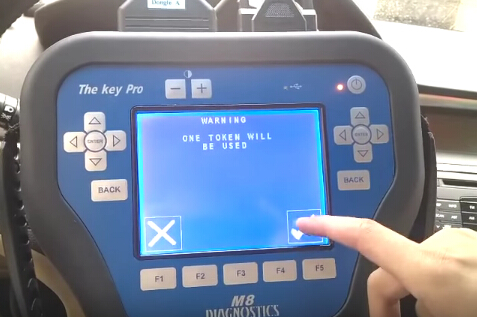
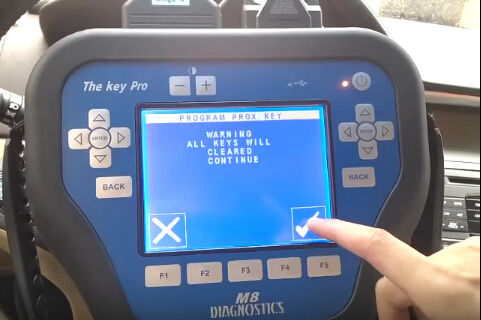
Step5. ECU Identification Menu: press “Enter†button, choose “Special Functionsâ€â†’ “Program Prox. Keyâ€. It will show you “One token will be usedâ€, click “√â€. “All keys will be cleared, continueâ€, click “√†to continue.
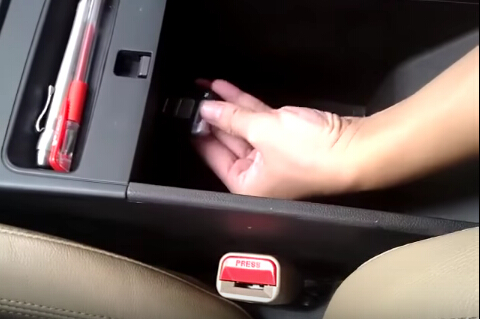
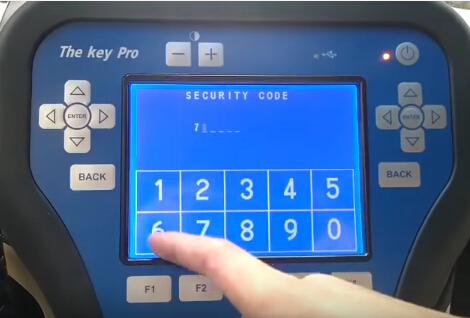
Step6. Key Pro M8 will show “Insert prox. key into slotâ€, then do as follow picture (The slot is beside driver’s seat), press “Enter†button. Enter security code.
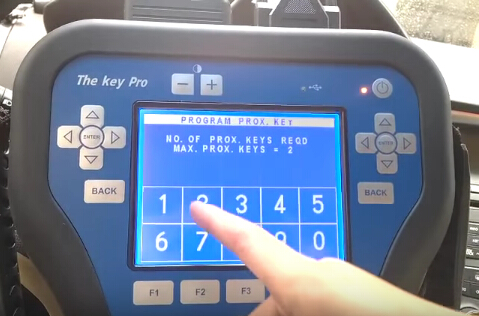
Step7. The screen will show “NO OF PROX. KEYS REQD, MAX PROX.KEYS=2â€, click 2, click “√â€. Wait a minute.

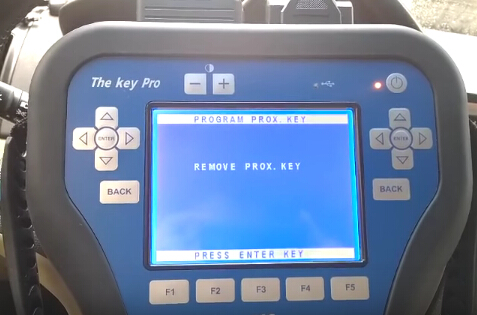
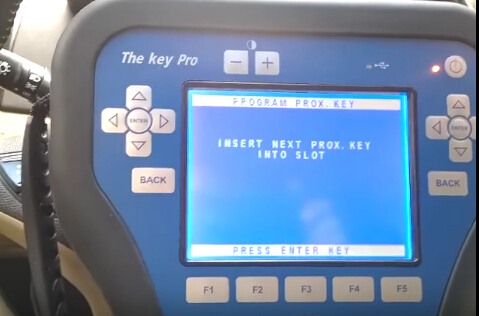
Step8. The screen shows “Remove prox. keyâ€, plug out the key from slot, press “Enter†button. It shows “Insert next prox. key into slotâ€, plug in another key, press “Enter†button.
Step9. Wait and you will see tokens are reduced. That means you succeed in making new key for Hyundai Santa Fe. Plug out the key, things done.

This is from OBD2 Francais website technical support:(Guide& picture) How Key Pro M8 make Hyundai Santa Fe Key?
|
obd2diy.fr:
obd2diy.fr s'applique spécialement à fournir d'appareil diagnostic auto - OBD2 Français Valise Diagnostique. Nous offrons des produits de haute qualité, le meilleur service et le prix le plus compétitif 存档
October 2019
类别 |
 RSS Feed
